Creating profiles: Difference between revisions
Jump to navigation
Jump to search
Created page with "First, go to <code>Settings > Profiles</code>. # Open the <code>Settings</code> window. ## Right-click on the Joyxoff icon located in the system tray. ## Select <code>Setting..." |
m Protected "Creating profiles" ([Edit=Allow only autoconfirmed users] (indefinite) [Move=Allow only autoconfirmed users] (indefinite)) |
||
| (One intermediate revision by the same user not shown) | |||
| Line 25: | Line 25: | ||
When you're done, just click OK button. | When you're done, just click OK button. | ||
[[Category:Overview]] | |||
Latest revision as of 07:26, 15 March 2020
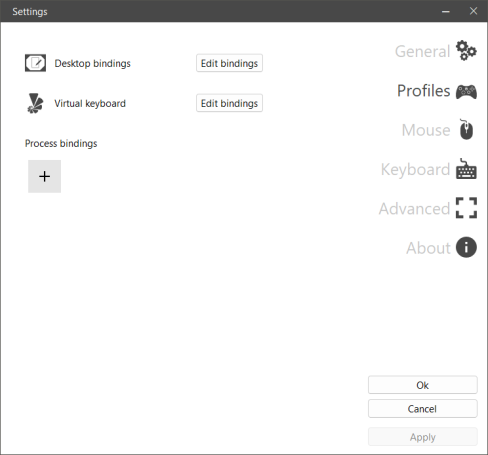
First, go to Settings > Profiles.
- Open the
Settingswindow.- Right-click on the Joyxoff icon located in the system tray.
- Select
Settingsoption.
- Select the
Profilestab.
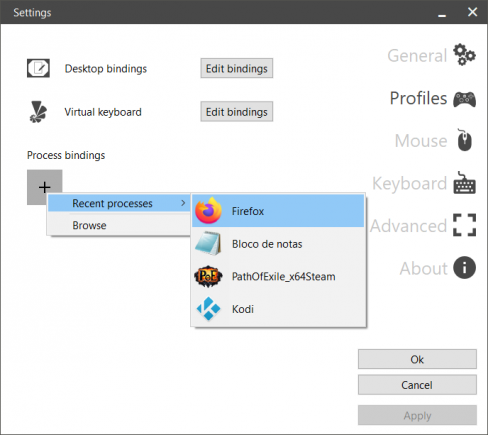
Now, the easiest way to do add a new profile is opening the application (or game) that you want to profile, otherwise you will need to browse to the application file path by selecting Browse. If you run a process with Joyxoff already running, the process will show up in this list when trying to add a new profile.
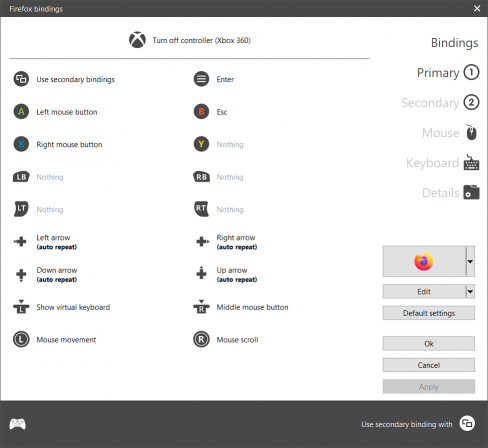
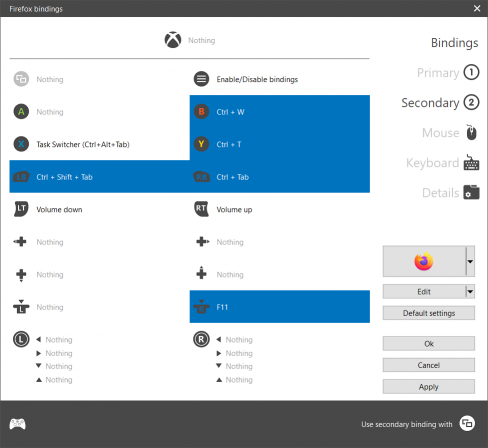
After chosen the application, it will shown an icon in Process Bindings list. Simply click on the icon and select Edit from menu. The Bindings window will popup.
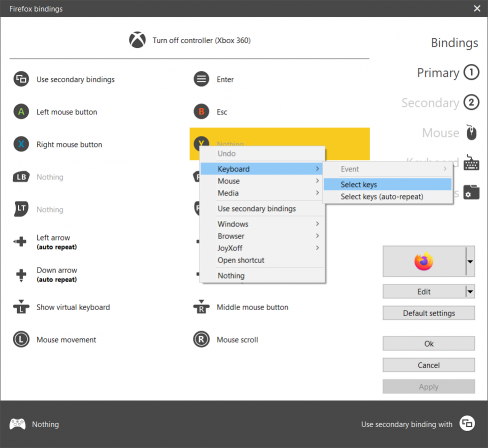
Right-click on the button in the grid that you want to map and choose a function to assign it.
For more details, see Bindings - Functions.
You can do the same in the Secondary tab.
When you're done, just click OK button.
